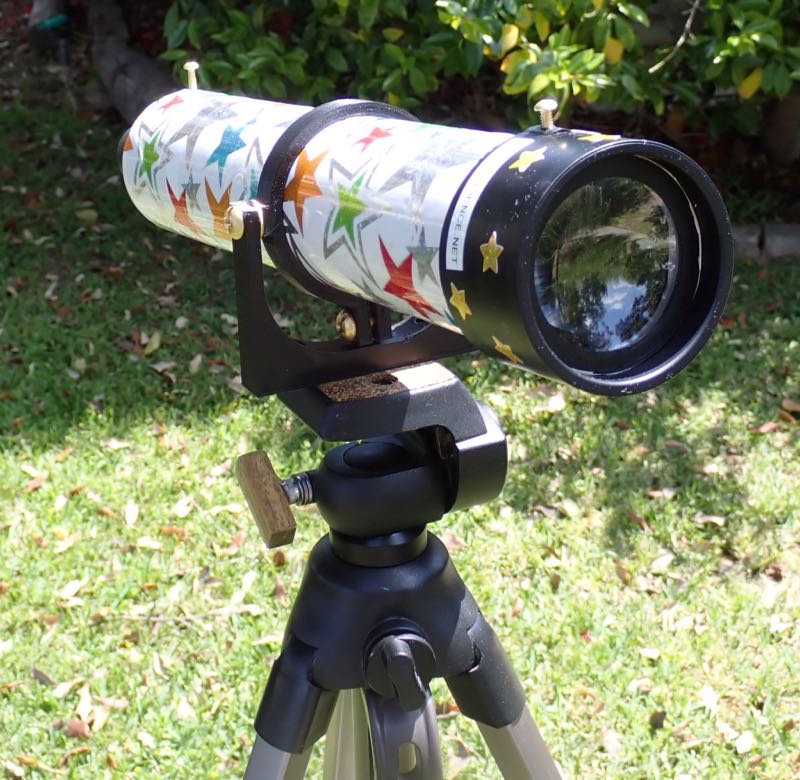
Mount SAC Astronomy students. You can easily make your own telescope! It will give beautiful views of the Moon's craters, the phases of Venus and the moons of Jupiter, Saturn's rings. It's much better than Galileo's telescope.
With this telescope the picture is right-side-up. So it also works well for bringing birds and distant wildlife up close.
I made the telescope you see above.
Its magnification is 40x. The objective lens is 51 mm in diameter, however I had to "stop it down," meaning I reduced its diameter to 25 mm. The reason is that the optical quality of the lens is not super-good as you get to the edge of the glass. (This is pretty normal for low-cost lenses.)
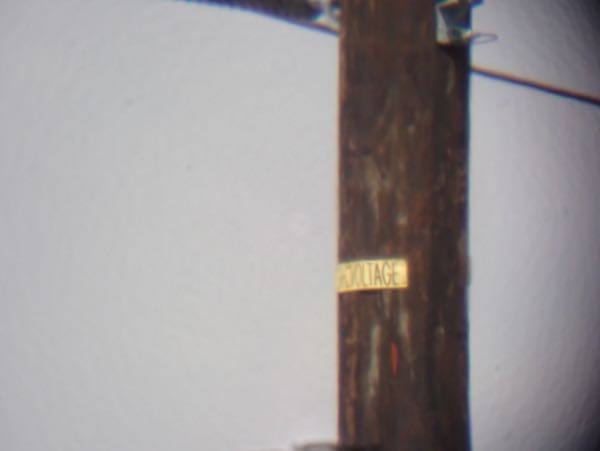
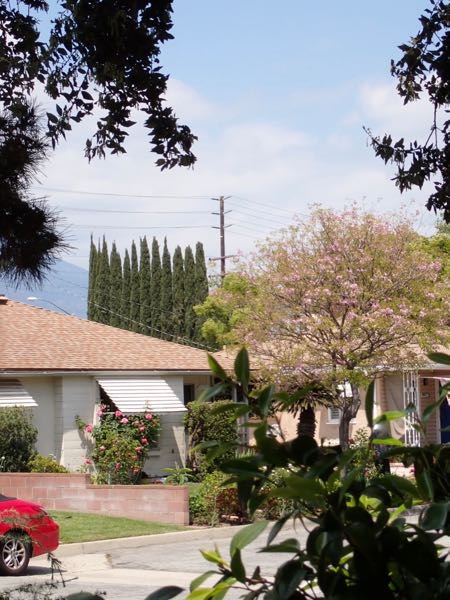
Even so, it works quite well. Here is a picture of a utility pole about 200 meters away, taken with and without the telescope:
To make this telescope, you will need access to a 3-D printer. (I will be at the Makerspace to help you with the 3-D printers.) I'm providing the .STL files and original "source code" files for all the printed parts. I'm using FreeCAD version 0.20.2, freely available here: www.freecad.org
Link to the 3-D parts zip file:
https://halverscience.net/telescopes/your_telescope_2023/2023_scope_3D_printing_files.zip
Parts list
Objective lens.
Surplus Shed L14811 360 mm fl, 51 mm dia $7.00
https://www.surplusshed.com/pages/item/L14811.html
Comment: This is the closest-to-optimal lens I could find below $10.00 as of April 2023. The ideal lens would have a shorter focal length, 250 to 300 mm, and a diameter in the 25 to 50 mm range. You could take apart an old telephoto lens or big old binoculars to get a nice lens.
Eyepiece with prism. These come from a pair of Amazon Materro High-Powered 8x21 Compact Binoculars $11.89 https://www.amazon.com/gp/product/B07D5N2BVX/
These are almost identical to the now discontinued Ozark Trail binoculars the original version of the telescope used.
Note: Each binocular provides lenses to make TWO telescopes. Work with a partner to save money!
Black ABS Pipe for the telescope tube. This is 2 inch drainage pipe Home Depot $8.97 for a 36 inch length. Since you only need 11.5 inches, one pipe is long enough to make three telescopes.
PVC coupling for dewcap/objective lens holder.
From Home Depot $2.12 This goes on the front end of the telescope. It holds and protects the objective lens.
https://www.homedepot.com/p/NIBCO-2-in-ABS-DWV-Hub-x-Hub-Coupling-C5801HD2/100346041
Brass screw, 1/4-20 thread, 1/2 inch long
$1.38 for a pack of four. (You will need three screws)
These screws help hold the telescope tube. You could use steel screws, but brass looks nice.
Note: Don't trust the pictures in the Home Depot web site.
Brass washers, size #14S for the previous mentioned screws. $1.38 for a pack of four. (You will need two washers.) These help the altitude motion of the telescope mount rotate smoothly.
https://www.homedepot.com/p/14-Brass-Flat-Washer-4-Pack-811641/204276458
Small brass screws to make sights to help point the telescope. (Optional).
I used 6-32 thread screws. The front one is 1/2 inch long and thre rear one is 3/8 inch long. These come in packs of six.
3/8 inch long: $1.38
1/2 inch long: $1.38
Masking Tape. $2.98 Tape is wrapped around the eyepiece holder and light baffles to make them fit inside the telescope tube. (The problem is that the drain pipe has slight size variations. I made the 3-D printed parts a bit small to accomodate narrower-than-average pipes. Fot the focuser, you will adjust the amount of tape to allow it to slide.
Silicone Glue. $9.48 Clear silicone glue to hold the objective lens and light baffles.
Decorative wrapping paper (Leftover from the holidays) Mount SAC students: get extra credit for nicely decorating your scope! :-)
Camera tripod. (I already had one for my camera.)
Three-D printed parts
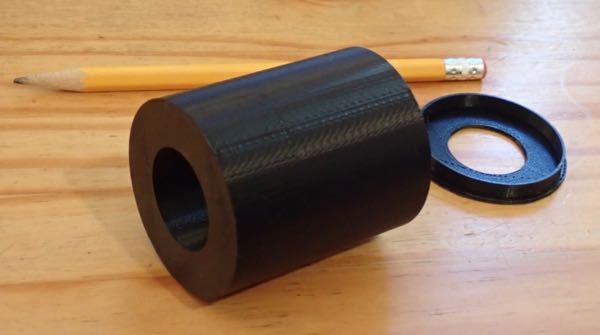
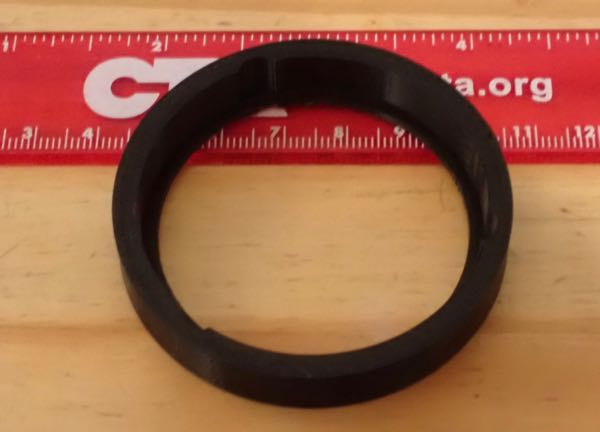
The outside diameter is 2 inches (25.4 mm), so it loosely fits inside the black pipe. You add tape around the holder to make it snug (not tight) so that it slides in the pipe, but doesn't fall out. You focus the telescope by sliding the eyepiece.
The baffle, which has a 1 inch (25.4 mm) opening gets glued to the front of the eyepiece holder. It is needed to stop stray reflections.
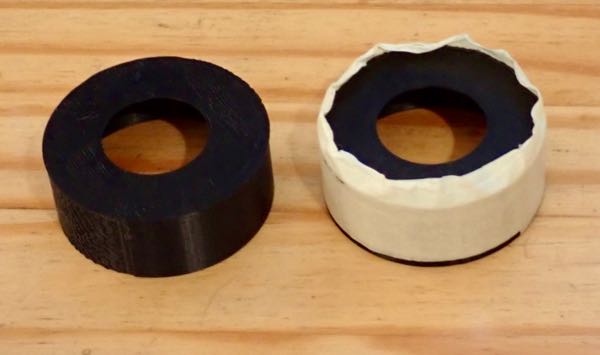
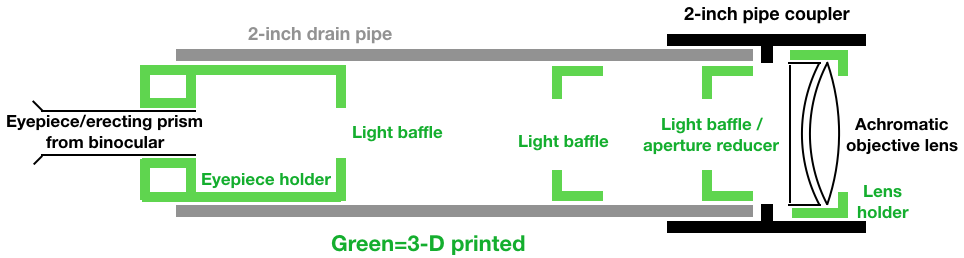
The light baffles have 1 inch (25.4 mm) openings. One goes just behind the objective lens. It's job is remove light from the outer parts of the lens. The 2nd one goes about 1/3rd of the way down the tube from the objective. It's job is to eliminate stray reflections inside the telescope. Note how I add tape to make the parts fit snugly inside the pipe.
This holds the objective lens, which is actually two pieces of glass. The glass is held in place by drops of silicone glue. (I like silicone because if I make a mistake, I can always peel it off and start over.)
The overall layout of the telescope is illustrated below. Make sure the objective lens is placed as shown.
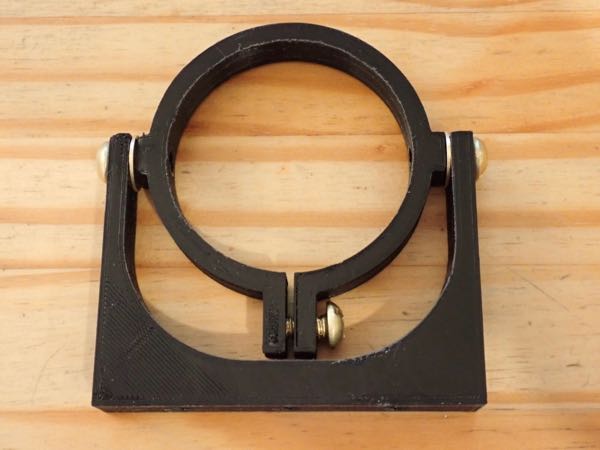
The fork goes on a camera tripod. The clamp holds the telescope tube. You can see how the 1/4-20 thread brass screws are used.
Tools
Saw to cut the pipe.
I used a miter saw because it makes perfect 90 degree cuts.
Sandpaper
Coarse and fine for cleaning the pipe and removing sharp edges, and cleaning 3-D printed parts.
Alcohol. Useful for removing fingerprints from lens surfaces.
Drill and 7/64 inch drill bit
I used a battery-powered drill which can spin slowly for making holes for the small brass screws. The plastic is soft enough that the screws will make their own threads.
Peter Halverson 5/2023
phalverson@mtsac.edu
pghalverson@gmail.com